We’ve now been in the new garden studio for a few months now and so I thought it’d be a good time to write a blog on the details, from who we used, to how long it took and how we decided on the interior of it. The blog will cover these main topics:
1. Who we used2. What size
3. How long it took to build
4. Planning the interior
5. The best bits
6. To conclude
1. WHO WE USED
For this project we used Herts Garden Rooms, we got quotes from 4 different businesses but we also checked reviews for each and the reviews for them were all very good. We could have potentially saved a bit by using different materials and traders however the problem with that is that it usually takes much longer, plus the logistics of using multiple traders means it takes a lot of your own time to manage. With HGR they manage it all, and use a very concise checklist to go through every little detail which you then go through with the owner Dean to ensure it’s all precise.
2. WHAT SIZE
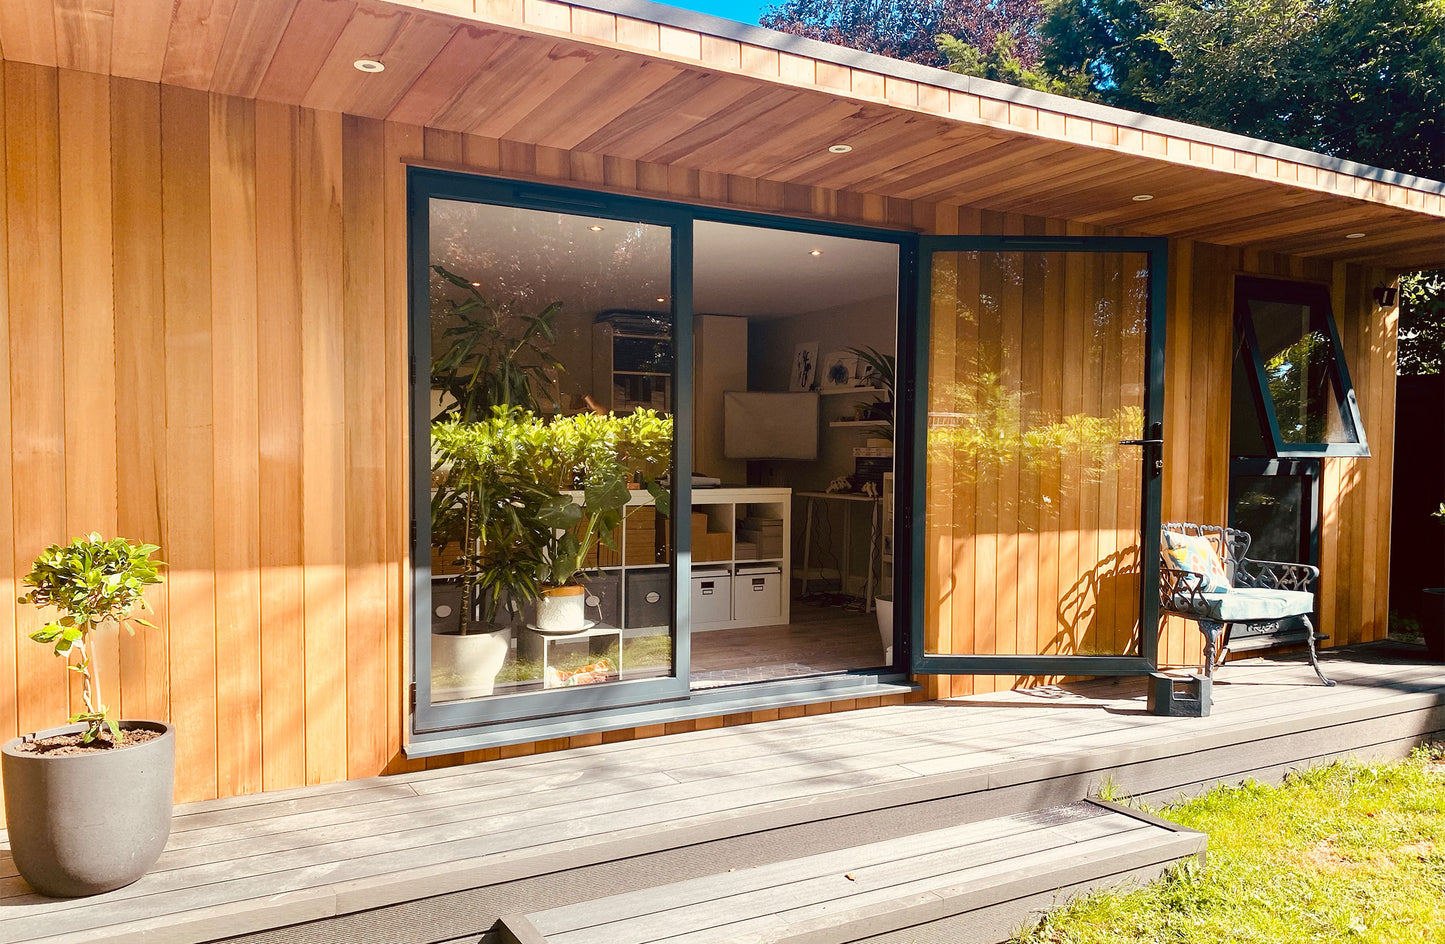
We initially wanted the studio to measure 9x4m however that would’ve meant getting planning permission (it needs to be within 30sqm with a max height of 2.5m), so we opted for a Western Cedar cladded ‘Jut’ design 7.5x4m with an inside partition wall so that a 2x4m space could be used for gym equipment. One thing I would mention is that if you choose to do something similar be wary of the height of the interior, the 2.5m requirement is the external dimensions plus the flat roof slopes, therefore the back of the interior space is a touch over 2m and if you need height for certain furniture or equipment then just bear this in mind.
Looking back, one thing we would’ve done differently is we wouldn’t have added the partition, we could’ve bought a tall IKEA Kallax unit to use as a divider with some plants on top to further block the space off, as it meant we could’ve adjusted the space if needed.
One other thing we would’ve done is increase the depth of the outer decking from 1m to 2m. The reason why is because the french windows are wider than we anticipated (this was my error for not checking the double door width!) as when you open the door the frame goes past the decking edge, so a little extra space to move around it would’ve been good but not something we’re too fussed over.

3. HOW LONG IT TOOK TO BUILD
The initial main build team consisted of 2 people (with other small teams of 2 depending on what’s being done, plastering, lighting etc.), and they were amazing! We couldn’t get over how quickly the bare bones of it was put together. If you’ve ever seen the Grand Designs episode of ‘the Hauf House’ it was like that. Extremely efficient and meticulous, they brought a large pop-up gazebo in case of bad weather, and basically just cracked on with it, we took a photo showing each stage and from start to finish in terms of getting the inside painted it took 2 weeks.
We had a few minor snagging issues which took an additional month to get completed (not a months worth of snagging, it didn’t stop us from getting in the space to furnish and start working from, purely just getting someone over to fix the small jobs) and whilst there was a little frustration in determining when people were going to turn up for this we would still highly recommend them to anyone thinking of building a garden studio space.
4. PLANNING THE INTERIOR
We knew that the bulk of our savings needed to go on the building itself, so when it came to the inside even though we would’ve loved to have had some custom built shelving we knew we couldn’t afford it, so we used IKEA units for all the storage furniture. The two desks were already in use previously and were IKEA hacks using Kallax shelving units with a large table top and adjustable legs. The back wall was put together using Hauga units with some picture rails in the middle. We used an additional Hauga unit as a little coffee station and bought a small fridge to pop in the corner.
The main thing for me was the need for as much flat spaces possible for being able to make products in batches and be able to store every component in an easy to reach area rather than having everything in cupboards or boxes. If it’s all in plain sight, it makes it so much easier to pull everything together quickly and also to keep a good idea of stock levels. Natural light, as lovely as it is, is the enemy with paper goods as it bleaches it extremely quickly, fortunately by having the overhang design it means the room is filled with light, but not too much direct light.
We didn’t have plumbing added as we thought we didn’t really need it, plus it then can class the space as a dwelling and there comes the planning permission hassle again which adds months and more money to your build. The one thing that drives me a bit crackers though is going back and forth to the house to wash my hands. I honestly have ocd with washing them (around 60 times a day) which came about because when you’re working with high quality uncoated paper and packing up products you don’t want any marks on the products. So another thing to consider is depending on the type of creative work you do, you may need plumbing purely for a small sink in there to access water quickly and easily (on the plus side my step count is much higher these days!)

5. THE BEST BITS
I can’t tell you what a difference it makes having a dedicated space to work in that’s separate from your home. It’s something that due to lockdown has been discussed a great deal in terms of the effect on your mental well-being of being able to have more of a ‘normal’ work/life balance and not having to feel like the day and evening all blur into one from being in the same space for it all. I now get up and actually feel like I’m ‘going to work’. I stop at noon for lunch, and I am much better at finishing between 5-6 and making sure that I’ve stepped away from it all to spend the evening with Gav and get away from work.
I absolutely love my morning routine of having a lovely cup of coffee and being able to look out into the garden to watch the birds (self-confessed crazy bird lady) and just being in a peaceful garden space. The plan for next year is to add planters in front of the decking and put in some evergreens along with lots of lavender and other bee-friendly flowers, we also plan to remove the central Laurel bush and put in a big pond bowl with lots of plants to attract more wildlife. This summer I’ve noticed so many more dragonflies in the garden and so fingers crossed by next summer this will all be in place with a nice little secluded seating area within it.
6. TO CONCLUDE
I hope that if you are planning to have a garden room added to your home, that you’ve found some useful information in this blog, and if you have any specific questions about the build, interior or anything else then I’m happy to help however I can. We count ourselves extremely lucky to have been able to create this space, and even if you’re thinking of having it done on a smaller scale there are some seriously clever ideas out there on how to plan the space and what other cheaper alternatives are available for your budget. We knew when we put all our savings into it that our holidays for the foreseeable would consist of pitching a tent in the garden! It does mean sacrificing other things but for us it was 100% worth it.